Showing posts with label clothes. Show all posts

Friday, May 15, 2015

Making a Captain Marvel maternity top

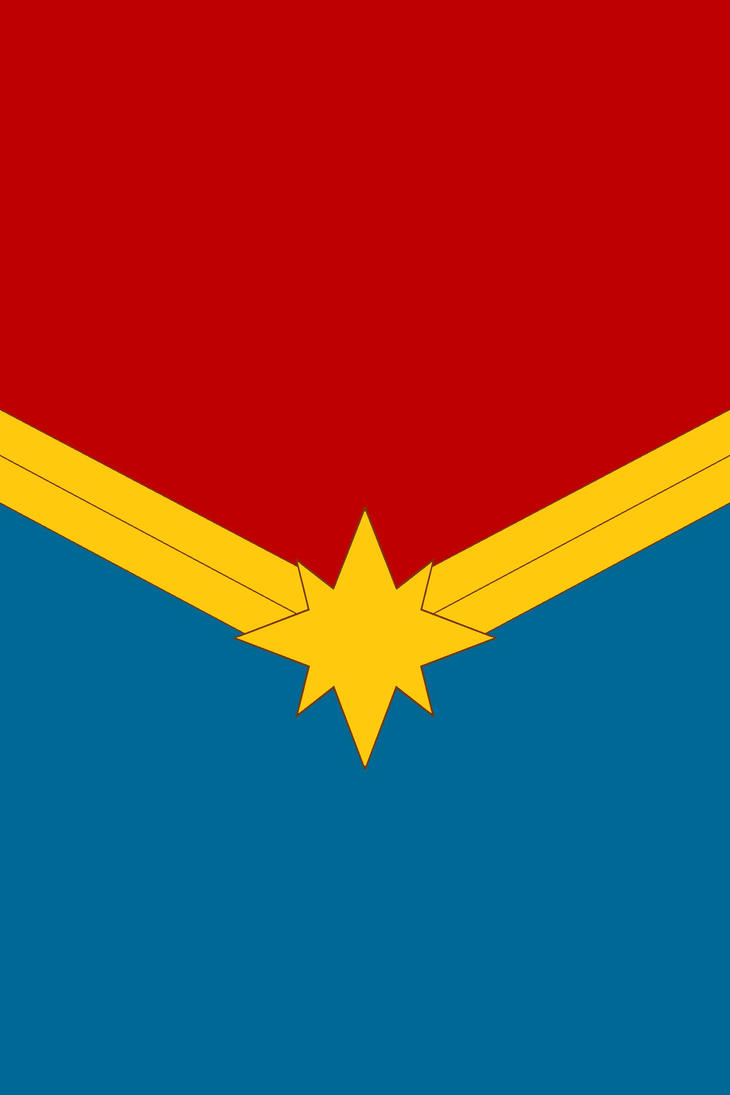
Ever since I saw Carol Danvers new Captain Marvel uniform I've wanted an everyday version of it.  I think the design is sleek, attractive and very wearable.  However, I can't make clothes from scratch.  So as maternity clothes are so bloody dull I decided to customise a basic navy blue t-shirt and put the major elements of Carol's uniform on it.

This is her uniform:
I used images from this Amber Unmasked tutorial and from this cosplay as reference shots.


My t-shirt is a navy blue version of this one from Mothercare's Blooming Marvellous range:

I used yellow material leftover from my Supergirl t-shirt, and bought new red fabric that matched the feel and stretch of the t-shirt.  I also used paper thin enough to trace images from my laptop onto, fabric scissors, pins, a sheet of bonda web, yellow and red thread and a disappearing ink pen. Then I started making it, using this process:

The Star

  • Find a decent image of the star design online.  I used this one from this site.
  • Save the image as a jpeg onto your desktop, zoom in to the size you want and then trace the shape onto paper. Don't piss about trying to work out how to scale up from the original picture size.  This sort of geometric pattern doesn't get fuzzy enough (when enlarged) to be a problem.
  • Straighten up the hand drawn lines with a ruler and make a copy of this star template.
  • Mark the front of your paper template with 'front'.
  • Put your t-shirt on. pin the paper star in place on your t-shirt.
The Gold Bars
  • Still with the t-shirt on, put a pin on the edge of the tee roughly where you want the gold bars to end.
  • Take off the t-shirt (carefully, without impaling yourself), use some more pins to place where you think one double gold stripe should go - check against your reference material to see how the stripes come out of the star.  The pins should look something like this:
  • Put your paper on the tee and trace the rough shape you want.  Just trace the shape of the double stripes, don't split them into two yet.
  • Tidy up the lines with a ruler.   Cut out the bar (write front right on it).  If you flip it over you should have a bar that fits the other side of the star.  Write front left on this.
  • Measure the height of your stripes and cut them in half, horizontally.  My stripes are 4.5cm in height, so I am cut them at the 2.25cm mark.
  • Make a couple of copies of these.
Your templates should resemble this:


The Red Bits

  • Place your paper on the tee, over the blank material above the stripes.  Roughly trace the shape of the top of the tee,  Tidy up your lines on the paper, cut out the template and mark front left or front right on it.  Make copies of this template.
Pin all pieces of the pattern on the t-shirt, so you have something that looks like this:

I'm actually quite proud of figuring out the pattern for this.  However I would invite you to notice that the front left to-be-red piece doesn't quite match the shape of the t-shirt at the top.  This caused a crappy patch job later on.

Cutting out the fabric
  • Get your copies of the star and bare templates.  Flip them over (so the side saying front is facing the material) and place them on the relevant bits of fabric.  Draw round the template with a disappearing ink pen.  Do it this way in case the ink doesn't disappear as well as you thought.  I figure that is the ink doesn't disappear the marks will be on the back anyway. 
  • Remember to cut the shape out of the fabric according to where the stretch is, e.g. widthways or heightways.
  • As this is a maternity tee I wanted the stretch to go horizontally, because I figure as my boobs expand horizontally will be a better fit than vertically and as the stripes are quite short in height, an horizontal stretch also seems sensible.
  • With the star, given that the star isn't asymmetrical (is that the right word?) make sure you've got the points of the star set up right when drawing round it on the fabric. 
  • When you cut out your stripes in the fabric, make them longer than the paper templates - just in case your template isn't long enough (a few millimetres short will cause a problem).  You can always cut them down to length once you've stuck the fabric on.
  • Remember to use fabric not paper scissors to cut out your material.
  • Repeat the above steps with bonda web, but using a pencil instead of the ink pen.
Putting it all on the t-shirt
Line up the bits of paper bonda web strips on the t-shirt, just to make sure it all roughly fits together, a la:

  • Get the star lined up right then everything else with follow.  It's handy having a v necked t-shirt as you know the top point of the star needs to sit right in the lowermost point of the v.
  • Place the bonda web under the yellow star then iron it on, according to bonda web instructions.
  • Do each gold bar one at a time, using the star to line everything up.  It  is fiddly!
  • The star and one bar will look like this (the white stuff is a piece of bonda web):
  • Remember how I said to make the fabric and bonda web pieces longer than that paper templates?  Now you have put the fabric on you can cut it (and the bonda web) to size, making sure they end right at the t-shirt seams.
  • Once the yellow is on put your red paper templates on.  if you are me, you now discover they don't fit right, so make a note on how to change them and cut out more fabric and bonda web as required.
  • Iron the red bits as as for the yellow parts.

You'll end up with this:

Remember how I talked about a patch job?  This is the gap on the left side which I ended up patching with a small bit of extra red:

You can also see the pattern of the tea towel I used to iron the bonda web on with.  A week later you can no longer see this pattern (hooray), but it does make me wonder how effectively the fabric is glued on.

Finishing it off

  • I used the sewing machine to sew around each yellow and red edge (as close to the edge as possible) just to make it a look a bit tidier and less like a 5 year old and been let loose with fabric.
  • On the yellow star, I ended up having to sew some of it backwards, because I forgot that you can swivel the fabric around as much as you'd like to make it sew forwards.  This is why you shouldn't sew when angry.
  • When sewing the red fabric around the t-shirt seam, be careful that you don't sew over the inside seam, like this:
Sewing over the seam means that your stitching on the other side will be wonky, like this:
In my case the fabric ended up bunched up like you can see in the picture, and I had to unpick a section.  This may not have happened quite so badly if the fabric was properly glued, but as you can see the bonda web and/or fabric wasn't all the way to the seam.

You can avoid this bunching happening by lining your fabric up right on your sewing machine and pushing this seam to the right of your needle.


The end result:


Close up from earlier, so you can see how it sits naturally:
For anyone wondering, the pointy bit in my bump is one piece of navel jewellery.  It's not my belly button popping out and it's not a limb.  I'm 28+6 in this picture - too early for that stuff to happen!

Here is a close up of the raggedy bits:
The yellow pieces are raggedy because of the type of fabric.  The stitches will help stop them fraying.  It does look amateurish, but I did wear it out in public today and felt OK in it.  The bonda web has made the red parts really stiff, which makes it sit strangely (see the above two photos), but nevermind.

I am definitely not going to extend the yellow and red around the back of the t-shirt.  This was enough for me, and took me hours.  Probably about 7 hours in total, because I'm slow.  I might try and find some yellow beads to put on the neck line, to mimic the ones on her gloves.

I guess this makes me a member of the Carol Corps.

Friday, March 27, 2015

Making a Linda Danvers costume - the S shield

Eesh, this might be a long post.  Feels like it will be a long post.

OK.  Making the S shield.  This felt like it took a long time to do because I did it over several weeks, in breaks, but in reality you could probably do it in an afternoon.

I found a tutorial for making the whole costume and spent what felt like several hour studying it.  I went and bought the material - stretchy yellow and not so stretchy red.  This turned out to cause problems.  Not buying a disappearing ink pen was also an error.
Once home, I soaked the material in warm water for about half an hour to see if the colours would run. They didn't.  Then I started studying the instructions again.

The tutorial was pretty good, but I did need to work some things out myself:

  • I used this template I found and printed it out on A4 paper.  Then realised I'd probably need more than one copy in case I fucked it up, so I traced another three copies.
  • I didn't use a cardboard, or posterboard or any of that stuff.  Because I didn't have any.  Instead I just cut out the shapes I needed from the template.  This is why you need at least 2 templates - one to cut out the bit that will be your red back, and one to cut out the yellow shapes, a la:
  • I amended the template slightly as my version of the shield wasn't going to need the topmost yellow bit.  So I just didn't cut that out.
  • Iron your fabric.
  • Draw the outline of your template onto the red material - I used a pencil and this didn't work great as you could still the pencil marks afterwards.
  • If you are going to follow this tutorial exactly it is really important that your shield material is the same stretch as your t-shirt, and that you match the stretch of the fabrics to each other and to the stretch of the t-shirt.
  • When marking out the interior outlines (where to cut) be really particular about your half an inch.  Make the half an inch the same on the red and yellow pieces of fabric.
  • Baste stitch means tacking.
  • When you sew the yellow bits to the red bits make sure your outlines line up.
  • It might be better to handsew the corners.
I didn't get as far as appliquing the smaller yellow bits on, because after I'd done the big yellow bits I ended up with this:
The tension affects how the thread goes in and if you are not good at corners you end up with creased, folded up red material.  That is unwearable.

Remember how I said it 's really important to get the half inch outlines accurate and lined up?  I didn't.  This happened:
The stretch on each piece of material don't match, so sewing them together on the machine was tricky.  It also led to the sewn in yellow bits being much larger than the holes in the red bits, which in turn means that the pencil lines are visible:
I know exactly what I did wrong and I knew it would be hard for me to fix it so I decided to try another way.

I used my template again, I cut out all the shape of the red bit and marked where the yellow bits should go.  I cut out the shape of the yellow bits.  I ironed everything again.

Then I got bonda web (it's a glue that comes in sheets that can be ironed onto fabric), cut out the templates of the yellow bits - you need to put the template on the bonda web back to front.  Then I lined everything up and stuck the yellow bits on the red bits.

To do this, you need to place your red fabric on the ironing board.  Take the paper backing off your bonda web pieces, place it on the right places on the fabric.  Place the yellow bits on the bonda web.  Dampen a tea towel, place it over your fabric and press a heated up iron over the tea towel.  Do not do ironing motions, just press the iron down onto the tea towel for about 30 seconds to a minute.  Gently take the tea towel off and poke at your fabric pieces.  If it's not properly stuck down, repeat.

Tips - when cutting out your yellow fabric place the template pieces on back to front.  That way your pencil lines will be on the side of the fabric next to the red material so you won't see anything.
Never place the iron directly onto the material you are sticking together - if you do that you'll destroy the iron and the fabric.
Try and line up the bonda web and the yellow pieces as accurately as possible, otherwise you may have a bit of glue seepage.  It's not a real problem as it's not reall ynoticeable, it's just that I'm a  perfectionist.

You should now something that looks like this:
Once the material has dried use your sewing machine to sew round the edges of the yellow pieces.  This will stop it fraying and if you do it neatly it looks rather nice.

Now you need to hem the edges of the red shield.  You'll need your iron again.  Fold the red fabric over where your pencil lines are, pin them and iron them flat.  Check you have ironed against the pencil lines.  If you haven't, adjust the pins and iron it again until you've got it right.  To prevent the corners being bulky and to help your machine go over the lumpy bits you can cut little triangle shapes out of the corner's a la:
Now hem the shield, keeping the sewing machine as close to the edge of the fabric as you can.  Mine ended up looking like this:
Close up of the stitching, first one including where you can see the escaping glue next to the yellow:


I'm pretty pleased with it.  Some of the stitching could be closer to the edges, and in that last picture you'll see where I didn't quite manage to go over the red stitching and ended up with 2 lines.  It's not a big deal.

For some reason I ended up with a lot of excess thread on the back of the shield, and at various times when finishing a line of stitching I ended up with 4 threads coming out of the machine.  I have no idea why.

Next up - sewing the shield to the t-shirt.  As per advice from my expert friend I put the top on, then placed the shield where I wanted it to sit.  When I took it off I noticed it wasn't sitting right in the middle of the t-shirt, so made adjustments.  This now means that when being worn the shield is slightly off centre, because my anatomy makes it so.  I should have taken more care that the t-shirt was on straight when I tried it on. le sigh.  Anyway, it's not a big problem.

You'll want to pin the shield on the shirt, then sew it on with your sewing machine.  Go slowly so the tension in the different  fabrics doesn't cause problems.  Your machine should have a platform thing which you can put the bit of the t-shirt you want to sew, onto, with the back of it underneath the platform.  As you are feeding the material through be careful not to sew the t-shirt together...
If you do this you need to carefully unpick it.  If you unpick it make sure you don't pull on the t-shirt too much (or you'll end up with holes in the material) and unpick it from the inside.

Eventually you'll end up with this:
Now feel very proud of yourself, make yourself a cup of tea and have a biscuit.  But don't spill anything on the t-shirt.

Next post will be a write up of the con with pictures :)

Sunday, March 08, 2015

Happy International Women's Day

I finished my Linda Danvers top:

I will be doing a lengthy blog post about how I made it, never fear!

Saturday, February 28, 2015

Casual Silver Banshee cosplay

I've got several days of leave to take before the end of March so I've now got 3 or 4 day weeks for a while, which is great, and most importantly, allows me to nap on the sofa on Friday afternoons while I re-watch Smallville, which I'm sure most of you know I love.  Smallville is my go to telly series for when I'm ill or don't want to think, or have a lazy day planned, so I'm currently on season 10.  Today I watched:
Warrior (which had Lois in an Amazon Princess outfit which is glorious)
Persuasion, which had Lois gaining the values of a traditional 50s housewife, while still being quintessentially Lois
Conspiracy, which is really, really quite dark
and Escape, which has Lois and Clark on a romantic getaway, to the same place that Oliver and Chloe go to, not for romance, but for a dirty weekend.  It's also got the Silver Banshee, whom I love. Particularly, I love her costume, so I got to thinking what could a casual Banshee cosplay look like.

This is the traditional Silver Banshee costume:

Now because I like the aesthetic so much I would love to do a true to the comic version of this costume, but I'm not sure I'd ever have the confidence to wear something so form fitting.  I also have a thing for Marvel's Black Cat's costume (it must be the monochrome), and a while ago I saw a great casual cosplay on tumblr.

Long story short, I was inspired by Smallville's episode and the Black Cat costume to come up with a casual outfit for the Silver Banshee.
These are the rules I'm playing to:

  • It's con casual, not everyday casual.  So it's something that needs to be recogniseable to other comic fans.
  • The outfit must ape the banshee's costume enough to be recogniseable but must consist of ordinary clothes I would myself wear everyday.


I found these items online which I thought would work:


Bangle by Liquorish from ASOS - to be worn one on each wrist
Black scoop neck top from Dorothy Perkins
Monochrome Top from Asos collection
Skinny black lisbon jeans from Asos
Boots from this ebay seller - they are called Oxford Roma and come from China.  I'd rather people bought goods from a UK shop though.

At a con you'd want to do Silver Banshee makeup, then I think you'd be recogniseable. What do you all reckon?

Alternatives:
Instead of the jeans you could do black tights and a black lycra mini skirt.  Instead of the tops I've chosen you could do a tight black vest, but then you'd need to sew on white panels to approximate the Banshee's vest.  This version would probably only work for summer.

Things I have learnt:
I hate clothes shopping, even virtually, and even when it's costume related.
I don't know the terms for enough types of garments to search effectively.
I'm probably not cut out for these sort of posts.

Sunday, January 25, 2015

Playing around with designs for a Captain Marvel themed skirt

So I think I'm close to making a Cap'n Marvel (Carol Danvers) themed skirt a reality.  This is the design I've come up with:

Colour shades aren't correct.

It's based on this costume:

I want it to have a dropped waist so it flares out from my hips, not my waist, and so hopefully won't drown me.  I want it to be above the knee. The vertical pencil lines are to show that I want it to be a bit gathered at the waist and so will drop in, well not pleats, but will hang in sort of lines.  Not quite how I've drawn it.  Does this make sense?  I don't want it hanging down completely flat.  I only like flat hanging skirts if they are also tight (hello 3 lycra minis of mine).  I want something loose around my legs for the summer, but tight at the waist so I still have a shape.

I think the star logo needs to be on the side and needs to be in the lower half of the skirt.  I've inverted the colour order so it's blue-yellow-red from the top, rather than red-yellow-blue, on the basis that I wear quite long tops and you wouldn't otherwise see the the red.  I'm wondering how to incorporate the yellow buttons from her gloves, but I can't think of a way to do this and make it look like a sensible part of the design.

What do you all reckon?

Wednesday, January 14, 2015

Linky time

Look, here's a great post of the vast majority of skirt, bag, dress, shoe etc styles:
http://fullofwhoa.tumblr.com/post/107079509098/dixiejos-right-here-is-it-everything-you-ever
There's a few styles missing, but the vast majority are there.  It looks useful for when I want to start making clothes.

Alternate universe Harry Potter where Aunt Petunia takes him in and loves him:
http://katzenfabrik.tumblr.com/post/106896187643/ink-splotch-what-if-when-petunia-dursley-found
It's beautiful and gut wrenching and well worth reading.

A North Korean defector's view on The Interview:
http://www.dazeddigital.com/artsandculture/article/23066/1/i-watched-the-interview-with-a-north-korean-defector
Really interesting.

A really, really good dahl recipe:
http://georginahayden.com/my-go-to-south-indian-dal-recipe/
Seriously good.  Seriously seriously good.  The recipes on this woman's site are great - always tasty and simply to do (at least I've chosen the simple to do ones - I leave the complicated ones!)

Thursday, October 30, 2014

Well whaddya know, bras do wear in

I was all ready to write a furious and blistering post about how bras are really hard to fit and how it's infuriating when you think something fits in the shop and then you wear it for a day and it turns out it doesn't.

I bought 2 bras last week. A zebra print one and a leopard print one (my first in each print!!)  I got fitted in store, we'd decided on the sizes that fit me (one of them is a 30J...) and I took them home.
Wore the 30J (!!! I was expecting to come out with a 30HH at most!) the next day and within 2 hours the bit between my breasts was digging in.  It continued doing so the next few days I wore it.  This has happened before and I came to the conclusion that it's due to the difference in size between my breasts.

Having different sized boobs isn't unusual.  I'd say there's a 2 cup difference between mine.  Usually bra fitters fit to the larger size because if you don't you get that double boob/spillage effect on the larger one.  You do get some gaping on the cup on the smaller side, but this is at least hidden under clothes and you can't hide the spillage.

After having the wires dig into my sternum for a few days I decided that when the bra is fitted to my larger side the wires are much too big on my smaller side, hence the uncomfortable feeling and occasional pain.  I was pretty narked about this because having worn it for a few hours you can't take it back.  I planned to take the other, unworn one back, because I figured I'd have the same problem.

Lo and behold, I put the worn one on again yesterday to find I had no pain!  It appears to have worn in.  this had never happened before.  I'm amazed.  I'd heard some women talk about how they wear in bras but I'd scoffed at them and thought they were just wearing the wrong sizes.  Oops.  Sorry ladies.

Now I'm debating whether or not to take the leopard print one back or whether to keep it and hope that it also wears in...

Anyone else experienced this??

Friday, October 17, 2014

Clothes and stuff

A little while ago I was blathering about how to make a casual Wonder Woman costume.  I am now really nearly rely ready to learn how to use my sewing machine - I have a friend coming over next weekend to teach me and everything.

I want to know how to use my sewing machine for two reasons.
- To be able to make costumes. These would be for cons and for everyday casual costumes. I'd like to be able to amend my Aquaman costume so I could wear it while not pregnant. I'd like to customise a red vest so it becomes a Cassandra Sandsmark vest.

- To have clothes that fit me and that I can get fairly easily. Before getting pregnant I was an hourglass shape.  This makes it really hard to find clothes that fit, because I have large breasts, wide hips and a small waist and apparently clothes designers can't cope with this. Bugger off clothes designers.

Post pregnancy I am more pear shaped, because like every other mother my middle has puddled into pudding. I suspect that given time, exercise and a less cake filled diet my pudding will reduce but I won't ever be a pure hourglass shape again. This is fine, I'm not complaining and I don't for one second regret getting pregnant.

On my way down to reduced pudding status I am somewhat limited in my clothes that fit me.  Clearly I don't want to wear maternity clothes. Equally I don't want to buy lots more new clothes.
This is my wardrobe and contains everything that fits me and some that doesn't:


(Note: needs more leopard print)

I have lots of colour. Most of my tops and skirts are colourful and patterned so nothing matches and my jeans are too small for me. So today I went and bought a black Lycra miniskirt. I bet some people would think it isn't appropriate for a 34 year old mother, but to them I say bugger off. I like tight clothes. I like short skirts.

Where am I going with this post? I don't know. I think that I will take photos of stuff I do make and blog them.  I would like to paint batwoman symbols on my leather gloves but I don't know how to do this.

I want to blog about stuff that interests me and over the last few months I've lost interest in comic reviews. I want to concentrate my reviewing on new readers stuff, not the regular weeklies. Although I might occasionally have thoughts on them. This post was inspired by me wanting to do a public picture of my wardrobe, and I have no idea why I wanted to do that.