Showing posts with label sewing. Show all posts

Friday, May 15, 2015

Making a Captain Marvel maternity top

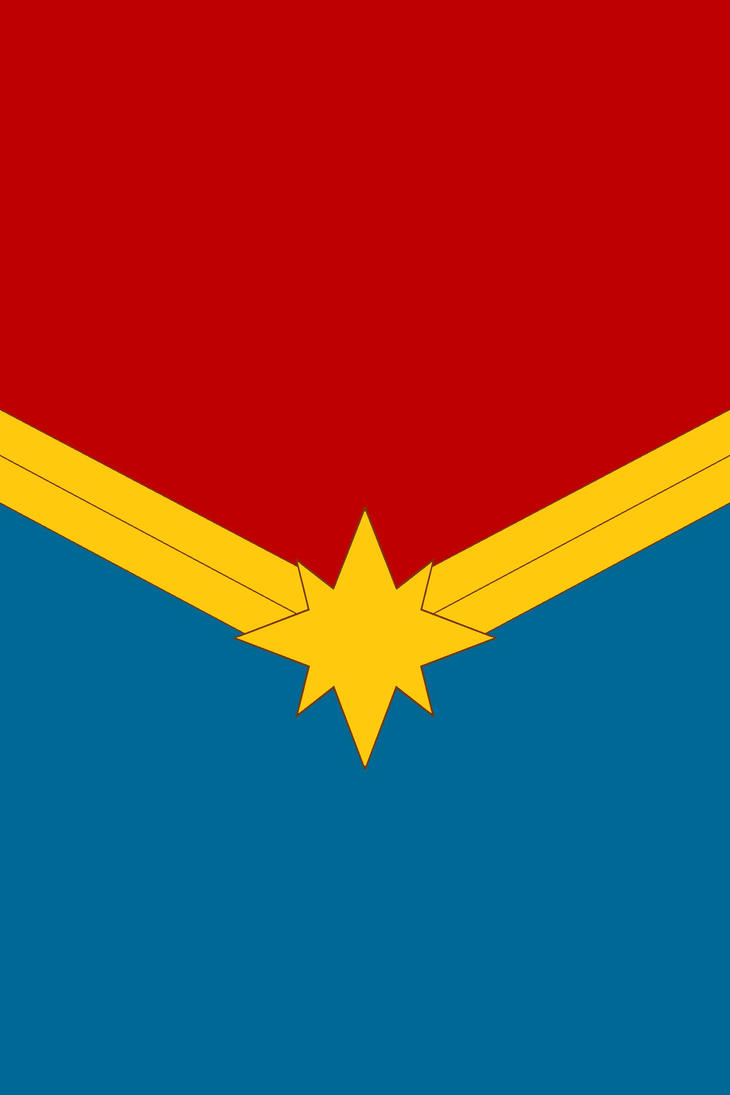
Ever since I saw Carol Danvers new Captain Marvel uniform I've wanted an everyday version of it.  I think the design is sleek, attractive and very wearable.  However, I can't make clothes from scratch.  So as maternity clothes are so bloody dull I decided to customise a basic navy blue t-shirt and put the major elements of Carol's uniform on it.

This is her uniform:
I used images from this Amber Unmasked tutorial and from this cosplay as reference shots.


My t-shirt is a navy blue version of this one from Mothercare's Blooming Marvellous range:

I used yellow material leftover from my Supergirl t-shirt, and bought new red fabric that matched the feel and stretch of the t-shirt.  I also used paper thin enough to trace images from my laptop onto, fabric scissors, pins, a sheet of bonda web, yellow and red thread and a disappearing ink pen. Then I started making it, using this process:

The Star

  • Find a decent image of the star design online.  I used this one from this site.
  • Save the image as a jpeg onto your desktop, zoom in to the size you want and then trace the shape onto paper. Don't piss about trying to work out how to scale up from the original picture size.  This sort of geometric pattern doesn't get fuzzy enough (when enlarged) to be a problem.
  • Straighten up the hand drawn lines with a ruler and make a copy of this star template.
  • Mark the front of your paper template with 'front'.
  • Put your t-shirt on. pin the paper star in place on your t-shirt.
The Gold Bars
  • Still with the t-shirt on, put a pin on the edge of the tee roughly where you want the gold bars to end.
  • Take off the t-shirt (carefully, without impaling yourself), use some more pins to place where you think one double gold stripe should go - check against your reference material to see how the stripes come out of the star.  The pins should look something like this:
  • Put your paper on the tee and trace the rough shape you want.  Just trace the shape of the double stripes, don't split them into two yet.
  • Tidy up the lines with a ruler.   Cut out the bar (write front right on it).  If you flip it over you should have a bar that fits the other side of the star.  Write front left on this.
  • Measure the height of your stripes and cut them in half, horizontally.  My stripes are 4.5cm in height, so I am cut them at the 2.25cm mark.
  • Make a couple of copies of these.
Your templates should resemble this:


The Red Bits

  • Place your paper on the tee, over the blank material above the stripes.  Roughly trace the shape of the top of the tee,  Tidy up your lines on the paper, cut out the template and mark front left or front right on it.  Make copies of this template.
Pin all pieces of the pattern on the t-shirt, so you have something that looks like this:

I'm actually quite proud of figuring out the pattern for this.  However I would invite you to notice that the front left to-be-red piece doesn't quite match the shape of the t-shirt at the top.  This caused a crappy patch job later on.

Cutting out the fabric
  • Get your copies of the star and bare templates.  Flip them over (so the side saying front is facing the material) and place them on the relevant bits of fabric.  Draw round the template with a disappearing ink pen.  Do it this way in case the ink doesn't disappear as well as you thought.  I figure that is the ink doesn't disappear the marks will be on the back anyway. 
  • Remember to cut the shape out of the fabric according to where the stretch is, e.g. widthways or heightways.
  • As this is a maternity tee I wanted the stretch to go horizontally, because I figure as my boobs expand horizontally will be a better fit than vertically and as the stripes are quite short in height, an horizontal stretch also seems sensible.
  • With the star, given that the star isn't asymmetrical (is that the right word?) make sure you've got the points of the star set up right when drawing round it on the fabric. 
  • When you cut out your stripes in the fabric, make them longer than the paper templates - just in case your template isn't long enough (a few millimetres short will cause a problem).  You can always cut them down to length once you've stuck the fabric on.
  • Remember to use fabric not paper scissors to cut out your material.
  • Repeat the above steps with bonda web, but using a pencil instead of the ink pen.
Putting it all on the t-shirt
Line up the bits of paper bonda web strips on the t-shirt, just to make sure it all roughly fits together, a la:

  • Get the star lined up right then everything else with follow.  It's handy having a v necked t-shirt as you know the top point of the star needs to sit right in the lowermost point of the v.
  • Place the bonda web under the yellow star then iron it on, according to bonda web instructions.
  • Do each gold bar one at a time, using the star to line everything up.  It  is fiddly!
  • The star and one bar will look like this (the white stuff is a piece of bonda web):
  • Remember how I said to make the fabric and bonda web pieces longer than that paper templates?  Now you have put the fabric on you can cut it (and the bonda web) to size, making sure they end right at the t-shirt seams.
  • Once the yellow is on put your red paper templates on.  if you are me, you now discover they don't fit right, so make a note on how to change them and cut out more fabric and bonda web as required.
  • Iron the red bits as as for the yellow parts.

You'll end up with this:

Remember how I talked about a patch job?  This is the gap on the left side which I ended up patching with a small bit of extra red:

You can also see the pattern of the tea towel I used to iron the bonda web on with.  A week later you can no longer see this pattern (hooray), but it does make me wonder how effectively the fabric is glued on.

Finishing it off

  • I used the sewing machine to sew around each yellow and red edge (as close to the edge as possible) just to make it a look a bit tidier and less like a 5 year old and been let loose with fabric.
  • On the yellow star, I ended up having to sew some of it backwards, because I forgot that you can swivel the fabric around as much as you'd like to make it sew forwards.  This is why you shouldn't sew when angry.
  • When sewing the red fabric around the t-shirt seam, be careful that you don't sew over the inside seam, like this:
Sewing over the seam means that your stitching on the other side will be wonky, like this:
In my case the fabric ended up bunched up like you can see in the picture, and I had to unpick a section.  This may not have happened quite so badly if the fabric was properly glued, but as you can see the bonda web and/or fabric wasn't all the way to the seam.

You can avoid this bunching happening by lining your fabric up right on your sewing machine and pushing this seam to the right of your needle.


The end result:


Close up from earlier, so you can see how it sits naturally:
For anyone wondering, the pointy bit in my bump is one piece of navel jewellery.  It's not my belly button popping out and it's not a limb.  I'm 28+6 in this picture - too early for that stuff to happen!

Here is a close up of the raggedy bits:
The yellow pieces are raggedy because of the type of fabric.  The stitches will help stop them fraying.  It does look amateurish, but I did wear it out in public today and felt OK in it.  The bonda web has made the red parts really stiff, which makes it sit strangely (see the above two photos), but nevermind.

I am definitely not going to extend the yellow and red around the back of the t-shirt.  This was enough for me, and took me hours.  Probably about 7 hours in total, because I'm slow.  I might try and find some yellow beads to put on the neck line, to mimic the ones on her gloves.

I guess this makes me a member of the Carol Corps.

Friday, March 27, 2015

Making a Linda Danvers costume - the S shield

Eesh, this might be a long post.  Feels like it will be a long post.

OK.  Making the S shield.  This felt like it took a long time to do because I did it over several weeks, in breaks, but in reality you could probably do it in an afternoon.

I found a tutorial for making the whole costume and spent what felt like several hour studying it.  I went and bought the material - stretchy yellow and not so stretchy red.  This turned out to cause problems.  Not buying a disappearing ink pen was also an error.
Once home, I soaked the material in warm water for about half an hour to see if the colours would run. They didn't.  Then I started studying the instructions again.

The tutorial was pretty good, but I did need to work some things out myself:

  • I used this template I found and printed it out on A4 paper.  Then realised I'd probably need more than one copy in case I fucked it up, so I traced another three copies.
  • I didn't use a cardboard, or posterboard or any of that stuff.  Because I didn't have any.  Instead I just cut out the shapes I needed from the template.  This is why you need at least 2 templates - one to cut out the bit that will be your red back, and one to cut out the yellow shapes, a la:
  • I amended the template slightly as my version of the shield wasn't going to need the topmost yellow bit.  So I just didn't cut that out.
  • Iron your fabric.
  • Draw the outline of your template onto the red material - I used a pencil and this didn't work great as you could still the pencil marks afterwards.
  • If you are going to follow this tutorial exactly it is really important that your shield material is the same stretch as your t-shirt, and that you match the stretch of the fabrics to each other and to the stretch of the t-shirt.
  • When marking out the interior outlines (where to cut) be really particular about your half an inch.  Make the half an inch the same on the red and yellow pieces of fabric.
  • Baste stitch means tacking.
  • When you sew the yellow bits to the red bits make sure your outlines line up.
  • It might be better to handsew the corners.
I didn't get as far as appliquing the smaller yellow bits on, because after I'd done the big yellow bits I ended up with this:
The tension affects how the thread goes in and if you are not good at corners you end up with creased, folded up red material.  That is unwearable.

Remember how I said it 's really important to get the half inch outlines accurate and lined up?  I didn't.  This happened:
The stretch on each piece of material don't match, so sewing them together on the machine was tricky.  It also led to the sewn in yellow bits being much larger than the holes in the red bits, which in turn means that the pencil lines are visible:
I know exactly what I did wrong and I knew it would be hard for me to fix it so I decided to try another way.

I used my template again, I cut out all the shape of the red bit and marked where the yellow bits should go.  I cut out the shape of the yellow bits.  I ironed everything again.

Then I got bonda web (it's a glue that comes in sheets that can be ironed onto fabric), cut out the templates of the yellow bits - you need to put the template on the bonda web back to front.  Then I lined everything up and stuck the yellow bits on the red bits.

To do this, you need to place your red fabric on the ironing board.  Take the paper backing off your bonda web pieces, place it on the right places on the fabric.  Place the yellow bits on the bonda web.  Dampen a tea towel, place it over your fabric and press a heated up iron over the tea towel.  Do not do ironing motions, just press the iron down onto the tea towel for about 30 seconds to a minute.  Gently take the tea towel off and poke at your fabric pieces.  If it's not properly stuck down, repeat.

Tips - when cutting out your yellow fabric place the template pieces on back to front.  That way your pencil lines will be on the side of the fabric next to the red material so you won't see anything.
Never place the iron directly onto the material you are sticking together - if you do that you'll destroy the iron and the fabric.
Try and line up the bonda web and the yellow pieces as accurately as possible, otherwise you may have a bit of glue seepage.  It's not a real problem as it's not reall ynoticeable, it's just that I'm a  perfectionist.

You should now something that looks like this:
Once the material has dried use your sewing machine to sew round the edges of the yellow pieces.  This will stop it fraying and if you do it neatly it looks rather nice.

Now you need to hem the edges of the red shield.  You'll need your iron again.  Fold the red fabric over where your pencil lines are, pin them and iron them flat.  Check you have ironed against the pencil lines.  If you haven't, adjust the pins and iron it again until you've got it right.  To prevent the corners being bulky and to help your machine go over the lumpy bits you can cut little triangle shapes out of the corner's a la:
Now hem the shield, keeping the sewing machine as close to the edge of the fabric as you can.  Mine ended up looking like this:
Close up of the stitching, first one including where you can see the escaping glue next to the yellow:


I'm pretty pleased with it.  Some of the stitching could be closer to the edges, and in that last picture you'll see where I didn't quite manage to go over the red stitching and ended up with 2 lines.  It's not a big deal.

For some reason I ended up with a lot of excess thread on the back of the shield, and at various times when finishing a line of stitching I ended up with 4 threads coming out of the machine.  I have no idea why.

Next up - sewing the shield to the t-shirt.  As per advice from my expert friend I put the top on, then placed the shield where I wanted it to sit.  When I took it off I noticed it wasn't sitting right in the middle of the t-shirt, so made adjustments.  This now means that when being worn the shield is slightly off centre, because my anatomy makes it so.  I should have taken more care that the t-shirt was on straight when I tried it on. le sigh.  Anyway, it's not a big problem.

You'll want to pin the shield on the shirt, then sew it on with your sewing machine.  Go slowly so the tension in the different  fabrics doesn't cause problems.  Your machine should have a platform thing which you can put the bit of the t-shirt you want to sew, onto, with the back of it underneath the platform.  As you are feeding the material through be careful not to sew the t-shirt together...
If you do this you need to carefully unpick it.  If you unpick it make sure you don't pull on the t-shirt too much (or you'll end up with holes in the material) and unpick it from the inside.

Eventually you'll end up with this:
Now feel very proud of yourself, make yourself a cup of tea and have a biscuit.  But don't spill anything on the t-shirt.

Next post will be a write up of the con with pictures :)

Thursday, March 26, 2015

Making a Linda Danvers Supergirl costume - the black hems

As I said in an earlier post, I was under the impression that the black hems on this costume were called piping:
First lesson: they aren't.  As far as I know they are just called hems.

So, how did I do it?  The material was about one and a half metres in length, and about 30 cm in width, I think.  I bought whatever the minimum was.  As it has lycra in it it quite curly and efforts to iron it weren't successful.

We measured the circumference of one of the arms of the t-shirt and then cut the black material to the same length.  If you can, cut a longer length (by 5 or 6 centimetres) than what you think you need.

We laid the material out on the table and somehow managed to fold over the straightest edge by half a centimetre, then folded it over again.  We pinned it and sewed it, a la this:
So long as you sew close to the edge of your folded over bit (and not next to the hem_ you will catch both folded over layers when you sew.

When you're sewing it (and I'm assuming you are using a sewing machine) use black thread on both the bobbin and the needle and be as steady as you can.  If you go fast then slow it mucks up the tension and the needle kind of jumps around the fabric and can make it bunch up.  Not good.  It also pays to keep the edge of the folded bit as straight as you can - my machine has little lines on the silver bit you place the fabric on, which helps.  I imagine most machines have this.

Next, we measured how deep we wanted the black bit to be.  My t-shirt had capped sleeves which I thought would be really difficult to sew as there isn't much space on the bit under the armpit.  My friend pointed out we could use the black material to lengthen the arms.  A-ha!  This is why I needed help,,,

We decided 4cm would be a good length for the black hems.  We measured 4 cm from the bottom of our sewn hem (above picture), folded the material over and then pinned it to the outside of the t-shirt, so that the hemmed bit we'd done above had the folded over bit on the inside.  From the bottom of the hem to where we'd pinned it was 4 cms.  Like this:
The next bit is tricky to explain.  We'd pinned the black material on the tee so that the pins were on the inside of the black material.  We then flipped the material up so the bit that would be visible was inside out and we sewed on the inside of the material, against the t-shirt hem line.  When you've gone all the way around you flip the black material back over so that the edges meet, and you sew them together so that the meeting material is on the inside.  Then you turn the t-shirt (or just the sleeve) inside out and chop off the excess material.

If you're like me that last part will only make sense when you begin to do it.

One sleeve worked fine like this, but I ran out of my pre-hemmed material on the other one.  I was by myself by this point and couldn't quite manage to hem a new length of material by myself again, so I opted to sew on what my friend has helped me do, then sew in a patch.  The patch ended up being quite messy, partly because I hadn't put the first one quite straight.
I had trouble using the machine to sew the edges of each part together so ended up hand sewing them together.  If you look closely it's a mess, but as the patch is only under the armpit it's not really noticeable.  You cna also see where I failed to sew against the hemline... don't do that.

Lessons learned here are that tension matters even more when you are sewing one type of fabric onto another.

Next we did the hem on the bottom of the t-shirt.  We weren't interested in lengthening this so we measured 9 cm height of material and pinned it so that 4 cm were visible on the outside of the t-shirt, and about 1cm was folded over, so you didn't have a raw edge on display.  Et voila: 

 Then we pinned it and sewed it, trying to make sure we got the hem on the outside, and the black material on the other side.  It's fine to have a raw edge on the inside as no one will see that.  We hadn't cut the material quite the right length for his, so like the sleeves, there's a patch.  I managed to do this a lot more neatly than the sleeve, thankfully.

One thing you do want to be careful of us not bunching up the top you are sewing onto, because if you have to unpick it it is likely that you will leave little holes like this:

I think they'll close up in time but it's better to not do them in the first place.

The finished product:

It looked neater on.

Next post - making the S shield.  Twice.

Wednesday, March 25, 2015

Making a Linda Danvers Supergirl costume - the preparation

I will start by saying that I am in no way good at using a sewing machine, or good at working out patterns.  I am new to this.  Last year I made reusable wrapping paper and an apron.

Then I made (customised) this t-shirt for this costume, with copious help and advice from a friend:
This year I considered making a Captain Marvel maternity skirt but since doing the above t-shirt I expect that I'll end up just customising another maternity tee instead.

It took me a long time to build up to doing any part of this Supergirl top, because new things scare me.  I made a lot of mistakes along the way and I will try to share all of them so anybody else making something similar will hopefully not repeat my mistakes.

Choosing the t-shirt
I have been told by my friend that making tops is really hard as it's tricky to get the measurements across the shoulders, back, bust and waist right.  So I picked a white maternity t-shirt I already had, that I knew fitted me.  It's not exactly perfect. It should look like this:
I didn't want to wear another crop top so I'm happy with it being long.  I just could not find a white tee with a high neck.  The sleeves on mine are quite short, I think they are referred to as cap sleeves, and again, finding a white mat t-shirt with the right length sleeves was impossible.  So I settled for what I had.

Choosing the material
I bowed to the shop assistants knowledge here.  I went to Anglian Fashion Fabrics and explained what I wanted to do and the cotton/lycra mix of my t-shirt.  They sold me stretchy black fabric for the sleeves and hem, stretchy yellow fabric for the shield, and red fabric with barely any stretch.  As I'm a starter they said the non stretchy red fabric would be easier to work with as stretchy material curls and frays at the edges.  I think they were right.  They also sold me bonda web (a glue for material sold in sheets) to put the shield together.

I soaked the red and yellow material in warm water for half an hour to see if the dye would run.  I had to soak the black material overnight, and in the morning it was still leaking black dye.  I have no idea if it will run when I wash the finished tee, fingers crossed it won't.

Finding a pattern
I had no idea how to look up a pattern for the black bits, initially I thought they were called piping.  They're not.  But I did find a tutorial for sewing the S shield, here: http://theleagueofheroes.yuku.com/topic/1851/t/SUPERMAN-COSTUME---DIY-S-SHIELD-CAPE-BOOTS--BELT-MERGED.html#.VMJMZLCsWSo
It is a pretty good tutorial, although not really aimed at beginners.  I found some parts of it confusing but I shall elaborate on that when I explain how to make it.  Given how nervy I get about doing new things I had to read it over and over and over and over before I felt comfortable starting.

Equipment needed
A good pair of fabric scissors, black, red and yellow thread, pins, iron and ironing board, a sewing machine, a ruler, a pencil (not ideal but what I used), a flat surface and lots of space.

Sunday, January 25, 2015

Playing around with designs for a Captain Marvel themed skirt

So I think I'm close to making a Cap'n Marvel (Carol Danvers) themed skirt a reality.  This is the design I've come up with:

Colour shades aren't correct.

It's based on this costume:

I want it to have a dropped waist so it flares out from my hips, not my waist, and so hopefully won't drown me.  I want it to be above the knee. The vertical pencil lines are to show that I want it to be a bit gathered at the waist and so will drop in, well not pleats, but will hang in sort of lines.  Not quite how I've drawn it.  Does this make sense?  I don't want it hanging down completely flat.  I only like flat hanging skirts if they are also tight (hello 3 lycra minis of mine).  I want something loose around my legs for the summer, but tight at the waist so I still have a shape.

I think the star logo needs to be on the side and needs to be in the lower half of the skirt.  I've inverted the colour order so it's blue-yellow-red from the top, rather than red-yellow-blue, on the basis that I wear quite long tops and you wouldn't otherwise see the the red.  I'm wondering how to incorporate the yellow buttons from her gloves, but I can't think of a way to do this and make it look like a sensible part of the design.

What do you all reckon?

Sunday, December 07, 2014

Crafty stuff

A month or so back I wrote about how I wanted to start making things.  I could link to the post but i can't be arsed.  Anyway, I made things.

First of all, I made reusable wrapping paper out of cotton fabric and a ribbon.  Et voila:


It's an elephant print fabric with a cow print ribbon.  Because I like mixing up animals.  Or more likely because I'm shit at finding matching things.  It's a rectangular shape.  I'm quite aware that the wrapping paper clashes horribly with the duvet cover.  I don't care, I couldn't be arsed to find somewhere else to photograph it.

Here's a close up of it:


Neat huh?  I had a friend help me do it.  It was pretty simple.  It involved folding over the edges twice (twice! who'da thunk it!), pinning them, ironing them them using the sewing machine to hem it.


Example of my hemming.  I can't work out how to rotate the picture.

There was a fancy technique to do the corners so they didn't end up really large and bumpy.  This technique involved cutting triangles out of part of the corners but I can't remember what it's called or exactly what we did.

The corners where the sewing machine was going over the folded fabric from the side of the folded bit worked fine.  The other corners where you run the sewing machine over the edge of the folded fabric didn't work so well as it bunched up, which you can sort of see here:
 Sewing the ribbon was also pretty easy.

It's quite a large piece of fabric so will wrap many things.  If you wrap a small thing you can use hairbands to tie the ends of the fabric into a cracker shape, which was an unexpected bonus.
I want to make a shirt out of this fabric but I am told that shirts are really difficult because of boobs and shoulders and backs and waists.  Bummer.

I also made a double sided apron for my niece:

 
This involved lots of measuring and cutting out of material and wooden spoons to turn tubes of straps inside out.  And lots of ironing.
We opted for velcro for the neck strap and the waist bands so she can have fun and control over taking it on and off.

I had to hand stitch some off the velcro for the waistband on and I am terrible at handstitching because I have no patience.  See:

Eek.  On the plus side, my niece is 2 and a half so she won't care about the quality of stitching.

And that is me getting crafty.  In the new year my friend is going to teach me how to make a skirt.  I want to make a Captain Marvel one.  Blue with a yellow star and some red stripes on.  I want a gathered skirt a bit like this but maybe rounder.  No idea how easy that is to make though.  I shall wait for advice from my friend.  Or just do whatever pattern my friend comes up with.  We are both in agreement that A line skirts suit nobody.  My friend is a great teacher and I'm really grateful for her help (thank you Christina!) because I would have had no idea how to even make an apron (turns out they are really simple) without her guidance.  And now I feel (sort of) comfortable with my sewing machine.

I still want a Captain Marvel dress, a bit like this one but with sleeves.  Maybe in a year or so when I am more skilled.  Or maybe I should buy a base blue dress and customise it myself.